


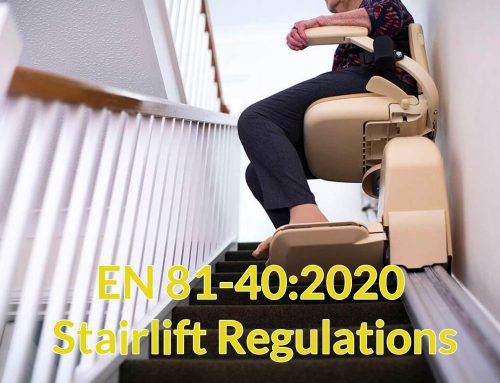
Introduction
Need Fault / Error Codes For Brooks / Acorn Stairlifts?
If you have an Brooks or Acorn stairlift then you’re probably on this page after searching for error codes. In case nothing below can help, we’re an Irish stairlift sales and repair company that provides fast support across all types of stairlifts including Acorn stairlifts.
PLEASE be aware that there’s 3 main models of straight stairlifts and 2 models of curved stairlifts – each with their own range of codes. More details have been provided on each set of fault / error codes.
Brooks / Acorn Straight Stairlift Fault Codes
Covering the Brooks / Acorn Superglide 120 and 130 straight stair lifts
If your stairlift displays a single digit code then chances is your stairlift has the T498 version circuit board. For example the older type stairlifts using the T498 board had single error codes like “1” or “5” etc. If your stairlift displays a single code and doesn’t flash between two codes then chances is it’s using the old fault code system.
But for example if it normally displays a two digit code for example like “C4, E5, E3” etc then it’s using the newer T502 circuit board design, or an even newer board model.
Be aware these codes are for the STRAIGHT lifts only and you can see the codes for their curved stairlifts further down this blog.
Brooks or Acorn 120 Single Digit Fault Codes (Straight Stairlift) 2004-2010
If your Acorn stairlift displays a single code and doesn’t flash between another letter or number, then it’s using the T498 board or earlier. Below we’ve listed the codes and probable solution.
| Code | Description (Scroll Right To Read More) |
|---|---|
| 0 |
Batteries Low – Ensure lift is on a charge point and not beeping. If persistent then new batteries needed. Get a quote here. |
| 1 | Normal – The lift is charging, if the lift doesn’t move then there may be fault with the toggle switch. Try using remote to see if it works. |
| 2 | Not Charging – Lift is beeping and showing this code as the lift isn’t charging. Check to see if the transformer is plugged in. |
| 3 | Over Speed Governor Fault – The OSG has engaged, hand wind the stairlift up around 6 inches to reset this. |
| 4 | Seat Turned – Seat is in the turned position, put the seat back into it’s normal position for the stairlift to work again. |
| 5 | Key Switched Off – Turn the key on for the stairlift to work. |
| 6 | Final Limit Overrun – The lift has gone too far past it’s normal stopping position, hand wind stairlift further back / up depending where it is. |
| 7 | Footrest Downside Activated – Check to see there’s no obstructions on either side of the footrest. |
| 8 | Footrest Upside Activated – Check to see there’s no obstructions on either side of the footrest. |
| 9 | Carriage Upside Activated – Check to see there’s no obstructions on either side of the carriage / drive unit. |
| A | Carriage Downside Activated – Check to see there’s no obstructions on either side of the carriage / drive unit. |
| C | Batteries Flat – Leave it charge for at least 1 hour before using the lift again. |
| E | Brake Fault – Most likely low batteries are the cause but may also be a faulty brake. |
| F | Motor Fault – Try powering off the lift and back on again, if persistent then contact us for a repair. |
| U | Relay Fault – Power down the lift and switch back on again, if persistent then the main PCB board is faulty. |
Brooks or Acorn 120/130 Double Digit Fault Codes (Straight Stairlift) 2010-2016
Here’s where it gets confusing.. Since around 2010/2011 Acorn switched to the T502 board which uses double codes. Be wary that if your stairlift was made very recently then these codes may not be suitable. The fault codes below cover from 2010 to 2016 models of stairlifts, the latest model is covered further down past these codes below.
| Code | Description (Scroll Right To Read More) |
|---|---|
| A1 |
Not On Charge Point – This code means the stairlift is normal, however isn’t charging. Ensure lift is on charge point and power supply switched on. |
| A2 | Lift Moving Up – The lift is travelling in the upwards direction by means of it’s toggle switch. |
| A3 | Lift Moving Down – The lift is travelling in the down direction by means of it’s toggle switch. |
| A4 | Lift Moving Up – The lift is travelling in the upwards direction by means of it’s remote controls. |
| A5 | Lift Moving Down – The lift is travelling in the down direction by means of it’s remote controls. |
| C1 | Battery Charging – Lift is charging normally. |
| C4 | Battery Fully Charged – The batteries are fully charged on the stairlift. |
| C5 | Battery Fault – There’s a fault with the batteries and most likely needs replacement, contact us for quote. |
| E1 | Footrest Upside Activated – Check to see there’s no obstructions on either side of the footrest. |
| E2 | Footrest Downside Activated – Check to see there’s no obstructions on either side of the footrest. |
| E3 | Carriage Upside Activated – Check to see there’s no obstructions on either side of the carriage / drive unit. |
| E4 | Carriage Downside Activated – Check to see there’s no obstructions on either side of the carriage / drive unit. |
| E5 | Seat Turned – The seat is in it’s turned position, turn the seat back to normal for lift to work. |
| E8 | Battery Low – Drive the stairlift to the charge point top or bottom to recharge batteries. |
| E9 | Key Switched Off – Turn the key to the on position for the stairlift to return to normal. |
| F1 | Relay Fault – Turn the lift off and on again, if this doesn’t work then the main PCB board may need replacing. |
| F2 | Brake Fault – Most likely due to low batteries, let lift charge and if not resolved contact engineer as brake may be faulty. |
| F3 | Motor Fault – Turn the stairlift off and on again, if not resolved contact us for repair quote. |
| F4 | Motor Over Current – Either the lift is being used past it’s weight limit or the motor is faulty. |
| F5 | Battery Fault – Drive the lift down to it’s charge point and leave to charge for 1-2 hours. |
| F6 | Final Limit Overrun – The stairlift has gone past it’s intended stop, handwind the stairlift away from the stop a few inches to reset. |
| F7 | Overspeed Governor Fault – The OSG has tripped in the stairlift. Handwind the lift 8-10 inches in the UP direction only. |
| F8 | Multiple Errors – Multiple safety devices are faulty, contact us for a repair. |
| H1 | Multiple Errors – Multiple safety devices are faulty, contact us for a repair. |
| H2 | Multiple Errors – Multiple safety devices are faulty, contact us for a repair. |
| H3 | Multiple Errors – Multiple safety devices are faulty, contact us for a repair. |
| H4 | Safety Device Fault – Multiple safety devices are faulty, contact us for a repair. |
Brooks or Acorn 130 Double Digit Fault Codes (Straight Stairlift) 2016 Onwards
Since 2016, Acorn started using the T700 board design. On the lower side of the stairlift cover it should mention “T700” and that’s how you know it’s the latest design board that’s being used.
| Code | Description (Scroll Right To Read More) |
|---|---|
| A1 |
Not On Charge Point – This code means the stairlift is normal, however isn’t charging. Ensure lift is on charge point and power supply switched on. |
| A2 | Lift Moving Up – The lift is travelling in the upwards direction by means of it’s toggle switch. |
| A3 | Lift Moving Down – The lift is travelling in the down direction by means of it’s toggle switch. |
| A4 | Lift Moving Up – The lift is travelling in the upwards direction by means of it’s remote controls. |
| A5 | Lift Moving Down – The lift is travelling in the down direction by means of it’s remote controls. |
| C1-C5 | Battery Charging – The batteries are charging with the higher number meaning a fuller state of charge. |
| C6 | Battery Fully Charged – The batteries are fully charged on the stairlift. |
| C7 | Battery Fault – Charge voltage in the batteries are too low, if not resolved contact us for a repair quote. |
| C8 | Battery Fault – Charge voltage in the batteries are too high, if not resolved contact us for a repair quote. |
| C9 | Battery Fault – Charger connected but battery is not found or is faulty, if not resolved contact us for a repair quote. |
| E1 | Footrest Downside Activated – Check to see there’s no obstructions on either side of the footrest. |
| E2 | Footrest Upside Activated – Check to see there’s no obstructions on either side of the footrest. |
| E4 | Carriage Downside Activated – Check to see there’s no obstructions on either side of the carriage / drive unit. |
| E5 | Carriage Upside Activated – Check to see there’s no obstructions on either side of the carriage / drive unit. |
| E6 | Seat Turned – The seat is in it’s turned position, turn the seat back to normal for lift to work. |
| E7 | Battery Low – Drive the stairlift down to the lower charge point to recharge batteries. |
| E9 | Key Switched Off – Turn the key to the on position for the stairlift to return to normal. |
| F1 | Relay Fault – Turn the lift off and on again, if this doesn’t work then the main PCB board may need replacing. |
| F2 | Brake Fault – Most likely due to low batteries, let lift charge and if not resolved contact engineer as brake may be faulty. |
| F3 | Motor Over Current – Either the lift is being used past it’s weight limit or the motor is faulty. |
| F5 | Battery Fault – Drive the lift down to it’s charge point and leave to charge for 1-2 hours. |
| F6 | Final Limit Overrun – The stairlift has gone past it’s intended stop, handwind the stairlift away from the stop a few inches to reset. |
| F7 | Overspeed Governor Fault – The OSG has tripped in the stairlift. Handwind the lift 8-10 inches in the UP direction only. |
| H1 | Safety Ground Fault SW1 – Check there’s no safety wiring wires touching the chassis, if unresolved contact us for a repair. |
| H2 | Safety Ground Fault SW2 – Check there’s no safety wiring wires touching the chassis, if unresolved contact us for a repair. |
| H3 | Hinge Communication Fault – Check there’s still power switched on from the mains. |
| H4 | Safety Ground Fault – Check there’s no safety wiring wires touching the chassis, if unresolved contact us for a repair. |
Brooks / Acorn Curved Stairlift Fault Codes
Since 2013 Acorn have moved to the T565 variant of boards for their stairlifts. You’ll know this if the stairlift flashes between 2 codes, for example “C1, E5” etc.
Be aware these codes are for the CURVED lifts only and you can see the codes for their straight stairlifts further up this blog.
Acorn 180 (Previously Acorn 80) Fault Codes (Curved Stairlift) 2013 Onwards
Prior to Acorn Stairlifts buying Bison, they had their own range of codes which are listed below. These older lifts are known to be problematic and a lot of the time the issue may require a board replacement as the older boards were only good for 5 or 6 reprogrammes.
| Code | Description (Scroll Right To Read More) |
|---|---|
| A1 |
Not On Charge Point – This code means the stairlift is normal, however isn’t charging. Ensure lift is on charge point and power supply switched on. |
| A2 | Lift Moving Up – The lift is travelling in the upwards direction by means of it’s toggle switch. |
| A3 | Lift Moving Down – The lift is travelling in the down direction by means of it’s toggle switch. |
| A4 | Lift Moving Up – The lift is travelling in the upwards direction by means of it’s remote controls. |
| A5 | Lift Moving Down – The lift is travelling in the down direction by means of it’s remote controls. |
| A9 | Hinge Operating – The lift is waiting on the hinge to operate. |
| C1 | Battery Charging – The batteries are charging with the higher number meaning a fuller state of charge. |
| C2 | Charger Volts Too Low – Voltage is too low from the charge point, possibly wiring issue or faulty charger. |
| C3 | Charger Volts Too High– Voltage is too high from the charge point, possibly a faulty charger. |
| C4 | Batteries Charged – The lift is on a charge point and the batteries have fully charged. |
| C5 | No Battery – The charger is connected but no batteries have been detected. |
| E1 | Footrest Downside Activated – Check to see there’s no obstructions on either side of the footrest. |
| E2 | Footrest Upside Activated – Check to see there’s no obstructions on either side of the footrest. |
| E3 | Footrest Underplate Activated – Check to see there’s no obstructions underneath the footrest. |
| E4 | Carriage Downside Activated – Check to see there’s no obstructions on either side of the carriage / drive unit. |
| E5 | Carriage Upside Activated – Check to see there’s no obstructions on either side of the carriage / drive unit. |
| E6 | Seat Turned – The seat is in it’s turned position, turn the seat back to normal for lift to work. |
| E7 | Battery Low – Drive the stairlift down to the lower charge point to recharge batteries. |
| E8 | Heat Sink Over Temperature – High temperature detected on main PCB board, power down for a period to cool down, if no success replace PCB. |
| E9 | Encoder Fault – There’s a fault with the drive or levelling encoder. Check encoder is working and replace if no success. |
| F1 | Relay Fault – Turn the lift off and on again, if this doesn’t work then the main PCB board may need replacing. |
| F2 | Brake Fault – Most likely due to low batteries, let lift charge and if not resolved contact engineer as brake may be faulty. |
| F3 | Motor Over Current – Either the lift is being used past it’s weight limit or the motor is faulty. |
| F4 | Tilt Motor Fault – Tilt motor demand too high, check for obstructions on both sides of lift. |
| F5 | Battery Flat – Drive the lift down to it’s charge point and leave to charge for 1-2 hours, may show an E7 code which will clear itself when recharged. |
| F6 | Final Limit Overrun – The stairlift has gone past it’s intended stop, handwind the stairlift away from the stop a few inches to reset. |
| F7 | Overspeed Governor Fault – The OSG has tripped in the stairlift. Service engineer required to reset this due to the complexities involved. |
| F8 | Tilt Limit Switch – The lift has gone beyond it’s expected angle, possible that the rail has sunken to a negative degree of angle. |
| F9 | OSG Pulse Not Present – The lift isn’t detecting OSG rotation when travelling, clean the front face of the rail and failing that replace the OSG. |
| H1 | Safety Switch Shorting Or Multiple Fault – There’s either a safety switch grounding with the chassis or there’s multiple faults on the safety loop. |
| H2 | Levelling System Over Reacting – There’s a fault with the drive or levelling encoder, contact us if the issue persists for a free quote. |
| H3 | Hinge Communication Fault – Check there’s still power switched on from the mains. |
| H4 | Secondary Processor Fault U2 – Switch off the lift and back on again, if unresolved contact us for a repair. |
| H5 | Memory Store Not Responding – Switch off the lift and back on again, if unresolved replace PCB or contact us for a repair. |
| H6 | Hinge End Limits Not Found – Check for obstructions with the powered hinge to ensure it can move up or down freely. |
| H7 | Over-tilt Fault – The stairlift has over tilted possibly due to a faulty encoder. If unresolved contact us for a repair. |
| H8 | Voltage Supply Limits Reached – Switch off the lift and back on again, if unresolved contact us for a repair. |
| H9 | Accelerometer Fault – Switch off the lift and back on again, if unresolved contact us for a repair. |
| J1 | Level Difference – Due to the level position changing, the lift needs to be reset by driving the lift to the top charge point. |
| J2 | Drive Position Difference – Due to the drive position changing, the lift needs to be reset by driving the lift to the top charge point. |
| J3 | Self Levelling Safety Mode – Drive the lift to the top charge point to clear this code. |
| J4 | Program Out Of Range – Possible encoder fault or reprogram needed. If unresolved contact us for a repair. |
| J5 | Program Fault – The program is not stored or may be corrupted. |
| J6 | Program Position Overrun – Drive the stairlift to the top charge point to reset. |
| J8 | Hinge Activation Point To Close – The lift is set within 80mm of the parking charge point, move the lift further away on programming. |
| U1 | Set Hand Mode (Program Mode) |
| U2 | Left Hand Mode Selected (Program Mode) |
| U3 | Right Hand Mode Selected (Program Mode) |
| P1 | Program Mode Stage 1 (Program Mode) |
| P2 | Program Mode Stage 2 (Program Mode) |
| P3 | Program Mode Stage 3 (Program Mode) |
| P4 | Programming Fail – Ensure charge points are wired and working correctly. |
| P8 | Controller Locked (Program Mode) |
| P9 | Waiting For Hinge Address Code (Program Mode) |
| L1-L7 | Speed Settings – L1 being the slowest all the way up to L7 being the fastest. No more than L4 on vertical bends and L3 on helical bends. |
| L8 | Hinge Operation Point (Program Mode) |
| L9 | Carriage & Seat Level Address Code (Program Mode) |


Leave A Comment
You must be logged in to post a comment.